| < Previous page | Next page > |
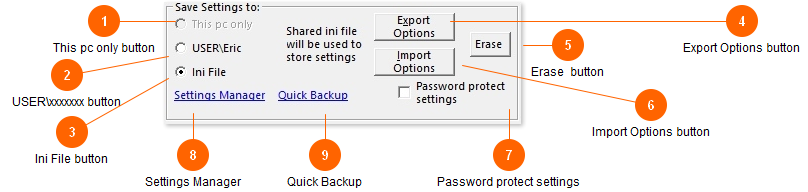
Save Settings to:
Where your settings are stored.
For maximum flexibility, your custom settings can be stored in 3 different locations.
*Note: On the first run of OLMonitor a test of the read/write abilities to the registry is performed and displayed. This should give you an idea of which location to use.
**Note: When you switch the settings location and click 'OK', all settings that are present on the screen will be saved to the new location and will overwrite any existing settings.
To load settings from another location see the section 'Reload with settings' option from the menu bar in the main screen.
'Reload with settings' is the safe way to tinker around with settings locations.
(you also may have to reload from your new location even after changing the settings location and clicking OK).
There is now a special program you can use to manage your settings: Ol Monitor Settings Manager
|
|
|
|
|
|
|
|
|


The structure of the Save Settings to:
| < Previous page | Next page > |
